For my final project, I wanted to do something special that will show my experience and the methods I was able to learn at the university, but at the same time, I wanted to create something meaningful for myself to look back to.
For the first few weeks, we were trying to decide what we should do and what path each one wants to take in terms of creating either an animation or a 3d modeling project. This was a really scary task for me personally, because I can never tell what I want, but I was able to jog down some ideas that will eventually help me come up with the final idea. I knew that I didn’t want to do an animation short almost immediately because I felt like I enjoy working with 3D models and environments way more than actually creating a story with animation. I struggled to really make up my mind at first as I didn’t know what direction I will also want to take career-wise. I knew that I enjoyed working with environments and I loved setting up scenes that tell you a story but just looking at it.
So the first few weeks, I really wanted to come up with a solid idea that will be able to show off my ability and also be fun to do. You don’t want to work on something if you aren’t having fun, at the end of the day that’s what it is all about. Finding what makes you happy. So, this project was the beginning of that for me since we had full freedom to do what we wanted.
After discussing it with lecturers, we talked about 3D environments and scenes in general, and how I might want to go about doing them. We did talk about how many pieces of assets I would have to create to be able to show off most of the environment. This meant that I would have to make a certain amount of buildings and then comes the rest to fletch out the scene. I spoke to most lecturers that day. I really gained some insight into what will be required for me to create in order to achieve the goal. This was a great opportunity to make up my mind and get some more ideas about what I wanted to create and how.
Straight away I instantly thought of the game “Dead by Daylight” and how much I like their maps and the way they are able to immerse the player into the world. I loved their game for years and I was only able to start playing it myself not too long ago. I love their style and the simplicity that they hold, yet so creative. I knew that I wanna be creating something of the sort, but at the same time I knew that I couldn’t create the whole game map since I wouldn’t have the time for it. I definitely decided on the style I wanted to go for, but now the hard part was deciding what I actually wanted to create and what scene to do I want to go with.


Throughout the weeks, I knew that I have to create at least 5 buildings and on top of that the rest of the props to fletch out the scene. It didn’t have to be 5 buildings specifically, it just that overall there needed to be models equivalent to that mount at the end to be able to reach my full potential for the marks.
I researched the artist “Marc Salha”, as he is one of the artists inside the company behind the “Dead by Daylight” franchise. I really wanted to see where an artist came from and how he creates his assets. I was invested in finding out most of it because I wanted to recreate the same style and feel of my assets for the scene. He started out as an animator early into his career as he worked on the “Batman: Vengeance” game. He then slowly transitioned towards environmental work, which is really cool because I feel like he has been trying stuff out and along that he was finding what he enjoyed doing the most. Now he’s an art director, which means he decides where everything goes and why. It is really inspiration truly. After looking at his style of work I was more eager then ever to begin creating my scene.
After talking to lecturers a little more, I decided that I might want to create something from my first ever home in Lithuanian. To recreate a meaningful memory that I have when I think off my first home. I really felt like this would be a great opportunity for me to create something different and enjoyable.
There were multiple houses and sheds where I lived back in the day, so I thought I would have enough material to work with in terms of assets and difficulty. I knew that I would love to make this because its my childhood home and the place holds the best memories I ever had. This has proven to me that I decided with the final idea that I will end up doing.
The location I created felt and looked way different to me when I was young age, and this is an amazing opportunity for me to go back and recreate how I felt about the place back in the day.

This is the gant chart that I have made for this project moving forward to keep myself inside a schedule and organised more then ever. Over the semester I wanted to make sure I am focusing on designing the house assets and the props that I will be needing for the final scene. All of the pre-production ideas and designs I wanted to make sure everything is finalised before Christmas, so I could focus on texturing and environment in the second hall of the year. I knew that I will have hard time managing my time, so I had to make sure I am getting the work done weekly/monthly. At the same time I wanted to keep on practising on different methods or ways of creating things, just so I keep learning new things as I go along. I was also advised to not focus too much on learning new things and sticking to stuff that I already know and keeping at it. This way I am not wasting too much time on the things that I wont be using.

This is the main reference images I was look through while looking back at my old town/home. I was only able to find the reference imagines by surfing through google maps and going back to my old home. In the second image that is my actually home I used to live in. I was happy I was able to at least get some imagines I can work. At the same time it was quite a challenge, since I could only get so close to the actual home, so making out details was really house. This is where more research had to come in. I have looked at multiple examples of old Lithuanian houses and structures. This way I am able to see which building I will be able to add to my scene and which original images I can use from my original reference images.

These are the main references of the Lithuanian old school houses that look similar to my actual home and most of these I really wanted to create or at least try my hardest to. I knew I will be picking at least a couple out of them, it was just the matter of which ones.
I did want to create everything in game style as the purpose of this project for me it is to create a game style trailer. After I am done creating the scene I will be recording a trailer with a soundtrack to make it look like a game trailer. I will be calling this project “Memory” of what it represents to me at the end of the day. I felt like the name is perfect and I was so happy about coming up with it. It’s simple, but very appropriate for what I am creating.
Game Style Refrences

I really like the style of “Valheim”, since it has a really nice colour theory that creates amazing environment that make you feel immersed. They have a very simple, yet effective assets that look really good from far and close up. I really enjoyed actually playing it and seeing the sights that the game has to offer.

Another game that I looked at, was “New World”. It is more of a recent MMO that came out and delivered some amazing models and environments for curious artists like myself to explore and use as inspiration.

And finally I made sure I was using my favourite game of all time “Lineage 2”. I loved this game since I was little and I wanted to make sure that I use it for refrences and inspiration as well. This project is like multiple pieces of my old life and recreating it, is very important. The in game assets that they have created over the years, always looked spectacular, so I knew that the style will mainly be this.
Film Inspirations

Before settling on final style and methods of creating the models, I always look at movies and try to see if I like anything at all that could help me set the final scene. Looking at images for me is important because I am able to look from the distance and realize what makes the scene look good.
Possible character

Since my project is 3D modelling I thought about adding some elements of character in the final shot of the video. To represent myself young self as a rigid model in the video. It was a good idea at the time and I liked it myself. This would also mean that I could do more character sculpting. At the same time since it is a modelling project lecturers said they don’t think it would be wise for me to focus on multiple things at the same time. If time allows it at a later date I would be including a certain character sculpt, but for the most part it will possibly end up not being used for the final render.
VFX

The plan for the final scene is that I wanted to do some VFX, whether it be some, fire or lightning effects. I am mainly interested in smoke or sun effect. That usually emits shadows and chances the scene by itself. Throughout the research, I was able to see that VFX is quite simple, yet so effective when it comes to creating a feel for the viewer.
In general, for this final project, I have a lot of goals and expectations to live up to. It is for myself and my lecturers and I feel like I owe it to myself to try my hardest to create the best that I can to create. I knew this project will be a struggle for me straight away since I know that I focus on many things at the same time and this will be an opportunity for me to change that.
My goal for this project is to continue modeling with applications Blender and Maya. I decided that I used Blender as the main modeling application before coming to the university, I will continue improving my skill within that application.
Improving the actual anatomy of my assets
Learning how to UV carefully and professionally as best as possible
Exploring Unreal Engine and learning more about its capabilities.
Creation of assets

This was the original sketch/design of my map from above of where everything will be going. I wanted to go for a yard full of buildings and life. Bring back the feel of a home.

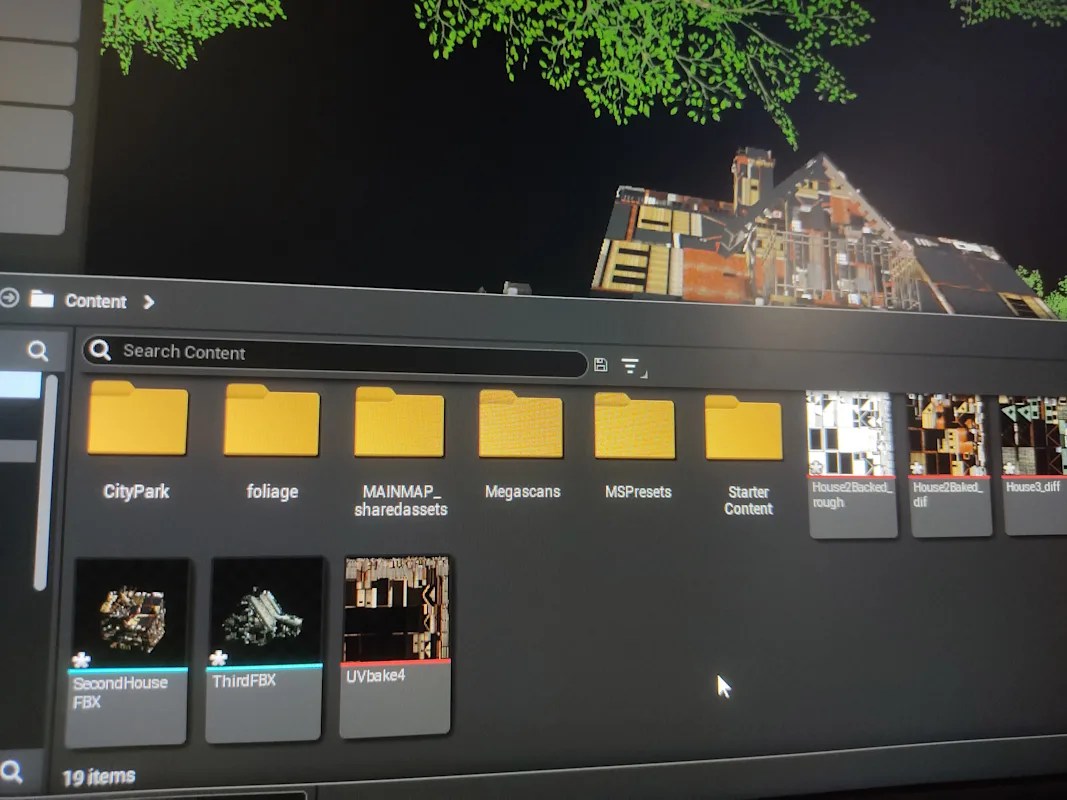
This was the first asset that I created and since it was the first one I wanted to make sure that the house was outstanding. This would be representing my actual home and what it represented to me when I lived inside of it. I never did any type of house like that so it was certainly a challenge. I really like the way the bars on the balcony worked out and compliment the house. As for everything else I had to watch a lot of tutorials to be able to create something like this. I am happy that my research is really good since I can tell which tutorials are useful for me. I did however struggle with UVs as usual, but I was able to finish them properly after getting some feedback on how to do them efficiently.

This is the second house that I created. This is our neighbour’s house and it was very similar to ours in a sense, except they didn’t use the upstairs for the most part. It was just there. It was much easier to model this house since I already knew how to manage different parts of the modeling to make sure I am not falling under the time limit to create assets.

I was trying out a different type of modeling for this specific model, but I ran into a lot of problems when it came to the polygons so I had to change pretty much most of the model from the ground up. It didn’t really ruin anything for the project, it’s just that I lost a bit of time because of it. After getting feedback for this specific house I realized where my issues were and I fixed them. Although I did really like the way textures looked on this one, it was very far from what I was going for in the final piece.
The biggest issue I ran into while modeling this, was that I used too many polygons of different shapes and sizes, This was very unprofessional and a mistake of mine. For the rest of the models, I was able to create beautiful neat houses with fewer polygons and cleaner UVs in general. I needed to do the same for this model, but I made a few decisions that didn’t work out.

I was able to get a closer look at the shed inside the google maps because I wanted to include this specific model in the scene of the final render. I loved working on this model because it looks the same as I imagined it would.


Additional models for the scene. I originally had a well like that for water gathering and has nothing close to water taps. I felt like it was very important for me to recreate that because it was one of the biggest aspects of life for me.
The other one would be the outside bathroom.
The last one would be the kid’s bike, it was something me and my brothers shared growing up, and the excitement we would have every time using it. It commemorates a lot for me personally. Extruding different shapes allowed me to keep it close to a reference as possible. I enjoyed making the shell around the chains of the bike. It was simple yet hard.
First Environment Renders


While I used the built-in sky and grass textures I wanted to come up with what could possibly look realistic game-style environment. So, far it started looking good and I like the way it was coming a lot. I still had a long way to go in terms of making it technically correct. I also started running into latency issues, since I was using a lot of polygons. Millions of polygons made the whole project stutter, so I had to redo the grass from the scratch.
After some feedback from lecturers, I was told to change my grass and include less of it to decrease the actual stuttering, because I wasn’t able to work on the project until I got some help. This took some time off my hands, but I was okay later on. I also realized that I will have to pay attention to what I use inside the project since it can take a toll on the final product.
The grass itself looked nice, but it was facing the same direction. It wasn’t what I was going for style-wise, so I had to change it.
At this point, I was trying my hardest to finish all of my models that needed fixing. I encountered a lot of issues with the environment, but I was able to talk to my lecturers and fix them fairly quickly. I was also told to include a more complex model like a tractor in the scene. I was thinking of the same line, but I never really thought of a tractor because I thought it wouldn’t be fitting for the scene as I was going for houses.
Environment Update

After feedback I had a lot of work to do inside the environment and as you are able to see I stripped it down to the start. The damage that I did while creating the grass was irreversible, so I had to recreate the environment again quickly. As you can see I used a different grass this time, but I just pasted it in and forgot to actually make it natural and look different. You can also see most of the models imported into the scene and everything regarding the models worked fine.

After amazing feedback, I knew I needed to model something very technical and detailed to show off. I had to fit with this whole style of my project, so an older version of a tractor had to be used. I am really happy with how it turned out. I wasn’t replicate the exact shape of the seat, but I used different references for that. What I enjoyed the most about it, was the specific little shapes inside the engine of the tractor. I had to use multiple tools to extrude and reshape multiple polygons, which was a challenge.
That is what it currently looked like with most of the models in it. The sound had to be muted due to copyright issues. Overall it looked okay, but after feedback, I understood that my camera shots were not great and the grass just looked linear and complicated. The ground itself also looked way too simple, so I was going to need to add an actual texture to the ground.
For the 2nd time, I wasn’t able to make the grass work, so I had to take a different approach and do it way differently than I was this whole time. I had to take time and do little by little to ensure it gives a free natural look. The same with the whole scene. I had some lighting issues below the bathroom model and inside the shed. You were able to look into the shed and see the background through it. I had fixed that in the coming few weeks.

Then there were other assets that I was going to include in the final shot/video of the scene. I knew for sure that I wanted the kid’s bike at this point, but I wasn’t sure if I will have to do the other ones. I was a little behind the schedule for these assets, so I had to exclude some of them to make room for others in the time that I have left.
Quickpixel


At the end anything that I could find for free I would also use to make the scene look more realistic and rich of life. Things like mushrooms and apples are perfect for my scene so I ended up including these free models. Hay and organisms like mushrooms are mainly the stuff I used that were free.
I also ended up making the ground texture and changing the plain yard that I had into something live and natural. After changing the ground and grass my environment started looking much better and I was so happy I was able to end up with natural-looking grass for once as it is something I had difficulty with throughout.
Research
The only good thing about the quarantine came, it’s that a lot of people have moved online and most of the content is online now, which makes it a bit easier to find whatever you’re looking for. I was able to attend to most guests that came to speak to us about a lot of things online. I was really glad we got all of these talented people to come and talk to us. We got to ask questions and learn the right way of doing certain things.


I really enjoyed James Dalton’s tutorial as it was very informative and interesting every step of the way. I liked the way he changed the color/roughness of the texture to match the final asset he’s going for.
Modeling and environment resources:
https://www.creativebloq.com/how-to/create-a-game-environment-in-unreal-engine-4
https://www.worldofleveldesign.com/categories/ue4/ue4-guide-to-scale-dimensions.php
https://docs.unrealengine.com/5.0/en-US/level-designer-quick-start-in-unreal-engine/
https://docs.unrealengine.com/4.26/en-US/BuildingWorlds/LightingAndShadows/
Below is a collection of artists/environments I looked at to help me create my assets and scene:
To break down the modeling of my houses and the environment I have kept coming back to these references and video guides since they are high-quality materials that I found really useful.
I found those models to be very particular and specific styles that I wanted to recreate.
I really love the cute anime style being used here, the models are simple but very unique and meaningful.
I enjoyed getting back into the blender for modeling as it is one of the most pleasant applications to work with. These youtube tutorials allowed me to understand my mistakes and things I could improve on.
Finding out how to create an animation video of my final scene was interesting because I was going for the game-type trailer, so I wanted to learn the best methods to do so.
I used Bandicam a lot to record the progress that I have made in the environment, so I can look back and see the differences that were made.
To help me organize the shots, it was important for me to know what I was trying to achieve during this project. For that, I was able to follow these tutorials that allowed me to create this outstanding scene. A lot of the advice given in the video is useful and I have been watching these videos for a while now. Overall, I learned a great method of producing a 3D environment to a professional standard.
After watching the tutorials and researching different references, I was able to come up with solutions to my grass problem, by carefully handling them slowly. I also added a ground texture to make sure that it looks like an actual ground and since there was a tractor there I made sure there are also some tracks. It made the scene seem very real and natural, yet containing the game feel.
